
So, I currently have a sourdough obsession. Gillian Liezil Berry planted the seed when she told me about her sourdough baking escapades in Singapore, and I was inspired to try 🤩
The executive summary is I bought bread flour and water, fed it for about two weeks (Should have been one week but because I was feeding every two days instead of one, it took longer) And tardah, the starter was ready
Literally kids, all you need is a jar, two teaspoons of water and two teaspoons of flour, mix and let it stand. 24 hours later- or as in my case, when you remember, you discard half and repeat the process. After about the 4th day you feed your starter every 12 hours – if you remember. 7 days later, or 10 days later or 14 days later you have a sourdough starter. And boof, Bob’s your uncle. You ready to bake bread.
Once you’re into the groove of baking, you don’t need to make a new starter each time. You simply start feeding your starter about two days before you want to bake. I keep my starter in the fridge until I’m ready. Take out the fridge about two days before I bake. And 24hours later it comes back to life.
Now the bread making process really has lots of steps – but it’s a routine. So step by step, let’s go….
Step 1: Mixing bowl and 375ml water
Take out your mixing bowl, add a cup and a half (325ml) water. I tend to use cooled boiled water but since you’re baking the bread I’m sure you could use tap water or bottled water for this.
Step 2: Add about 100 -200ml of fresh gooey sticky starter to the water and mix into a milky looking solution
Step 3: Then add about 500g flour. If you want some texture, add 400g white bread flour and 100g whole grain flour. Do not use cake flour. I can’t explain the science behind it, but in layman’s terms it’s has to do with the strength – capacity to build gluten needed to support the structure of the bread.
Step 4: Mix that. Once mixed (you can use a hand held dough wand – I’ve seen those on YouTube videos, although I just mostly prefer to use my hands) you’ll have a sticky mixture that threatens to stick to your hands but comes off without much difficulty when you wash.
Step 5: Let it rest for 30 minutes to draw water
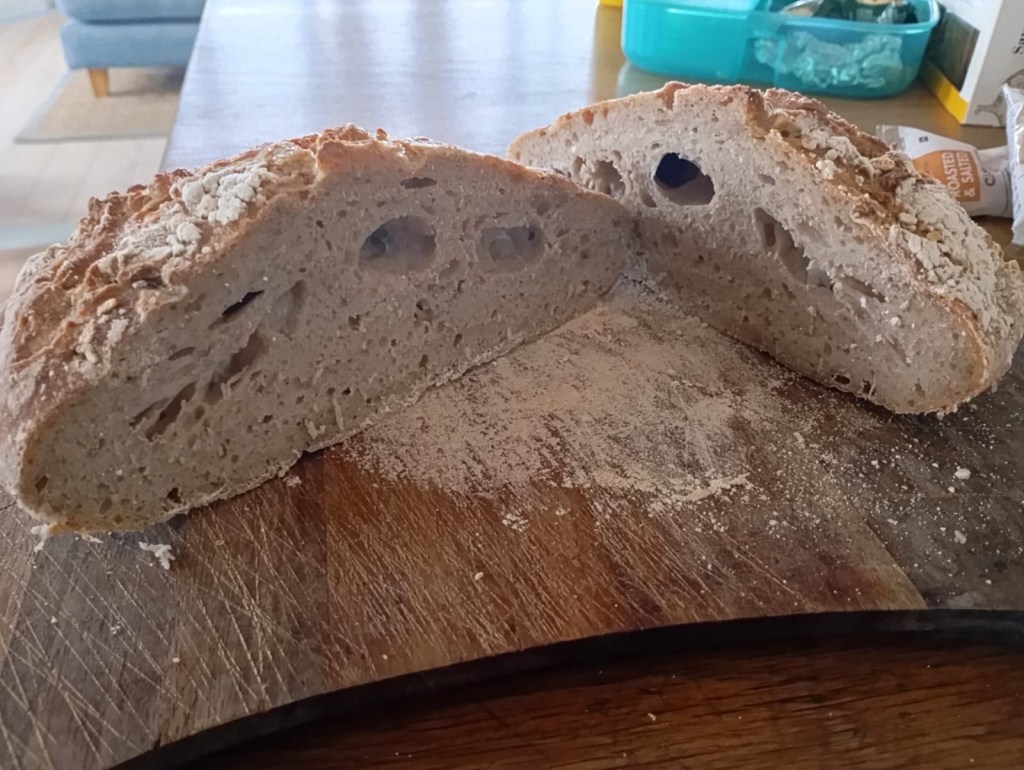
Step 6: Add a half teaspoon salt and mix again. Notice that the dough is not so gooey anymore. Letting it rest drew that water into the flour and it’s slightly more pliable. I’ve learned that if it’s too pliable at this stage, you’ll still get a great tasting bread, however it won’t have lots of holes in it. I personally love the holes.
(I forgot to make another short video – but basically just worked the salt in with some water)
Steps 7 to 10: So then we let it rest for thirty minutes before doing some stretches and folds. The dough will be rather sticky to touch, so it’s useful to wet your hands before performing this. To do a pull and fold position the bowl with the dough in front of you and at about the 1 o clock position pull on the dough – that is pull it outwards and upwards. Then take the end that just stretched and put it on the 7 o clock position. Now take the bowl with the dough and rotate the bowl so that the 1 o clock position it now at 4 o clock. (And the old 10 o clock position is the new 1 o clock). Keep repeating this step (3 more times) until the old 1 o clock is back in the 1o clock position and then flip the dough upside down. This is one step – that is, Step 7. Do this exact same thing, i.e. starting with letting the dough rest 3 more times (Steps 8 to 10).
Please take note, if you need to add flour to help make the dough manageable then by all means do. With each one of these steps the dough will become slightly more pliable. This is due to gluten formation, which simultaneously gives the bread structure. As far as possible try to keep the dough as sticky (wet) as you can if you want to bread to rise significantly. The more pliable the bread is (the more like play dough) the less it will rise. Don’t fret though if your dough is pliable, it will rise somewhat and it will be tasty but it will not be as airy.
Step 11. After your 4th stretch and fold, let the dough rest another 30minutes and then we start shaping it by taking it out of the bowl it’s in and dropping it onto the counter. At this stage your dough should be pulling away from the sides of the bowl, without much difficulty. If it’s not, then your dough is too sticky. If too sticky, I add a bit of flour but I’m careful not to add too much. In videos I’ve seen, the experts don’t need to put flour on the counter, however I still find it useful to flour my counter.
I think the trick to successful sour dough is figuring out the right amount of sticky vs pliable. I’m still playing around to find just the right balance – combination of sticky and pliable.
Then, to build tension (so that the dough will rise) and start shaping the dough, pull on all the sides of the dough, as if you’re making a squarish pancake shape. Once my square pancake shaped dough is spread out on the counter, I imagine it as three columns in front of me. I take the right column and fold it over the middle column. I then take the left column and fold it over the middle column. So now only the middle column remains because I put the right and left column on top of the middle column. I then start rolling the dough kinda the way that one would roll up a sleeping bag – or roll up your clothes when you packing a suitcase about to travel. With each roll, I tuck the dough in on itself, kind of patting it to get a bit of a round shape going. And after it’s completely rolled up, I roll it around some more with my dough knife.
Step 12. I now take my bowl (the empty bowl that the dough was in) and cover my dough and let it rest for thirty mins. It’s starts to puff out a bit. While resting I prepare my proofing container. If you have a banaton basket you can use that. I don’t have one, so I just use a clean dish towel and a Tupperware bowl, the same size as my mixing bowl.
Step 13. After the dough has rested for about 30 minutes it’s time for the final shaping step, which is to build tension and shape the dough. To do this I lift the container covering it and first kind of fold it into itself with the bread knife. Then I lift the dough off the counter top and place it into itself my ‘makeshift banaton basket’. This will be the proofing container. Once in the proofing container I start pinching the edges and folding the pinched edges into the centre of the dough. This is intended to build tension in the dough. I’m not 100% sure what the science is behind that – however I suspect it’s related to the bread raising.
Step 14 : Now we allow the bread to proof in the fridge for between 12 to 16 hours
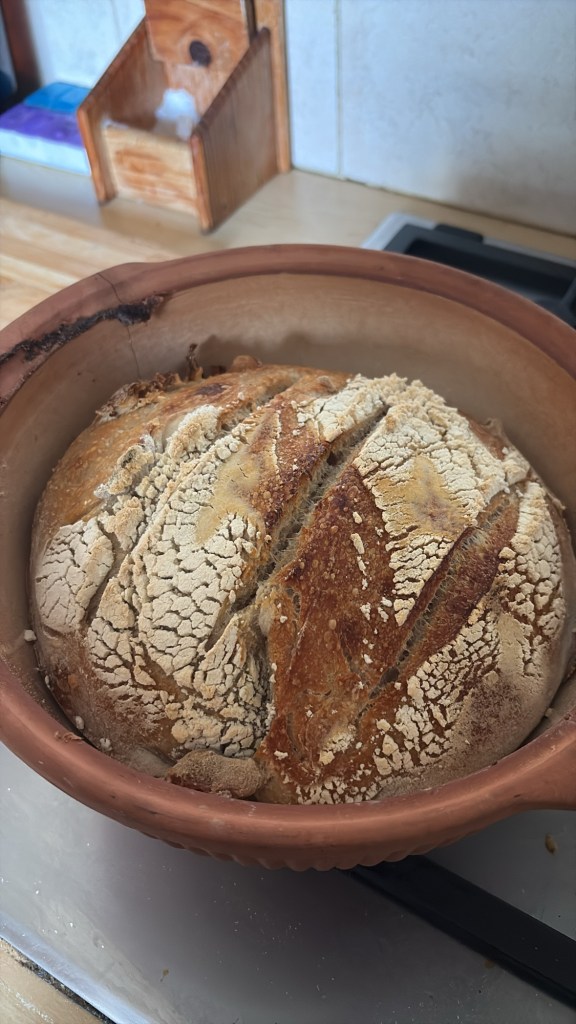
Step 15: After fridge proofing, the bread is ready to be baked. To start the process, when we ready to bake we heat the oven to about 220 degrees Celsius (About 430 degrees Fahrenheit). I then prepare my baking container – I use a clay pot with a lid. Gilly uses a cast iron pot. Either or any other, as long as it’s an ovenproof container with a lid I think you should be fine. I then sprinkle some flour in the clay pot and put it into itself the oven and wait until the temperature of oven and clay pot get to 220 degrees.
Step 16: Once everything is 220 degrees I get a huge ice cube of of the freezer and keep it on standby. I use the ice cube to create a Dutch oven in the clay pot. I then remove the clay pot and toss the ice cube in it. I then tip the bread over into the pot, place the lid on it and then bake for about 30 to 35 minutes.
Step 17: After 35 mins we open up and remove the lid. Then lover the temperature to 180 degrees Celsius (360 degrees Fahrenheit) and bake for another 15 to 20 minutes
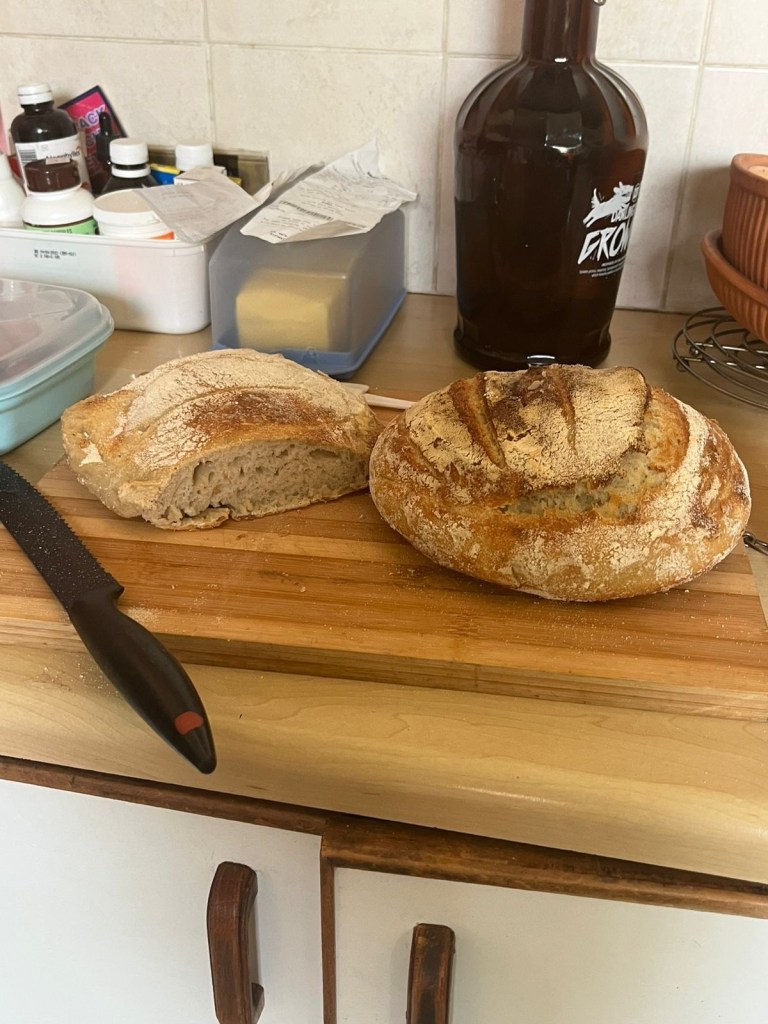
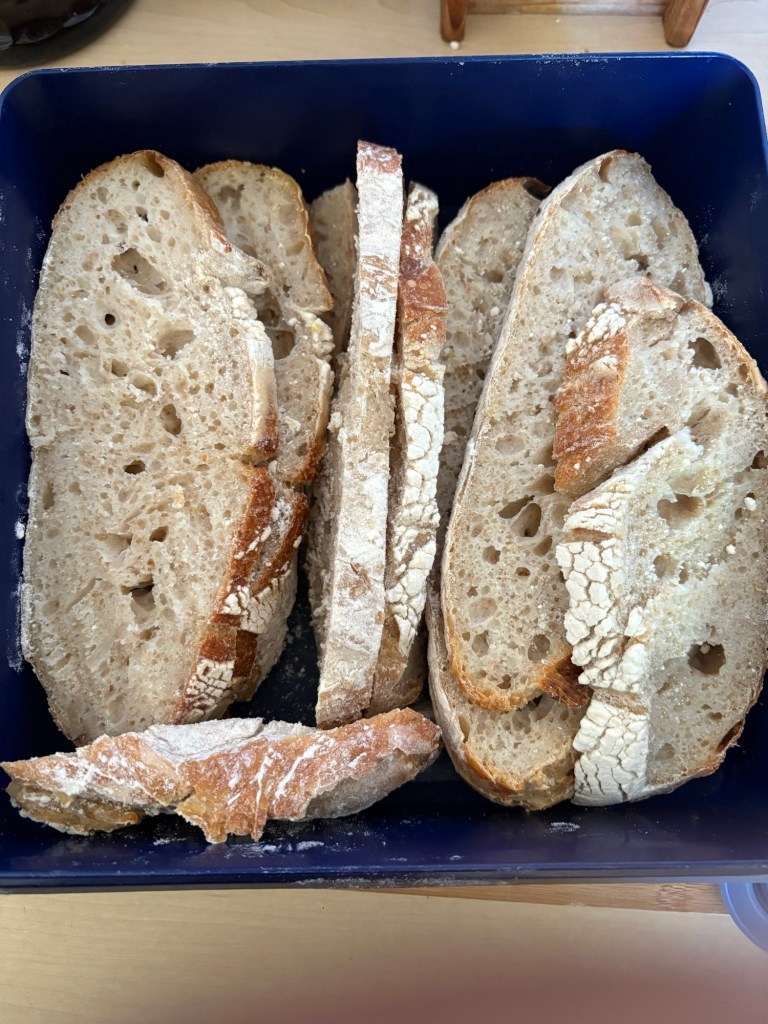
Step 18: Remove from oven (optionally remove from baking dish) and let it cool down completely before cutting into it. Apparently it become gummy if you cut into it before it’s fully cooled down.
Step 19: Enjoy your homemade sourdough bread 🥖


Next time you visit London, that’s what you can bring!
LikeLiked by 1 person
Hahahaha Yes. That’s a promise!
LikeLiked by 1 person